This is the first in a series of guest tutorials in the fine art of tifo-making. Got ideas? Send them to tifo@dark-clouds.com and we’ll get them published. And now some awesomeness from Doug Rhode:
Maybe you’ve seen some of those cool 2-poled flags at the game or on TV, and you’re thinking, “I wanna make one of those, but I’ve no idea how to get started.” The good news is you don’t need to have any real advanced skills to make something really awesome. This primer should give you enough info to make your first 2-pole or flag.
Create Your Design
If you have an idea, chances are there is an image on the web that’s going to serve as the basis for it. Download it and open it in your favorite image editing program like Photoshop or whatever. (I actually use a drawing program called Pixelmator which is a little bit more affordable) Use your drawing tools to get roughly in the same ballpark as what you want your finished product to look like. It doesn’t matter how ugly it looks on the screen – you just want it good enough to trace it onto your fabric later.
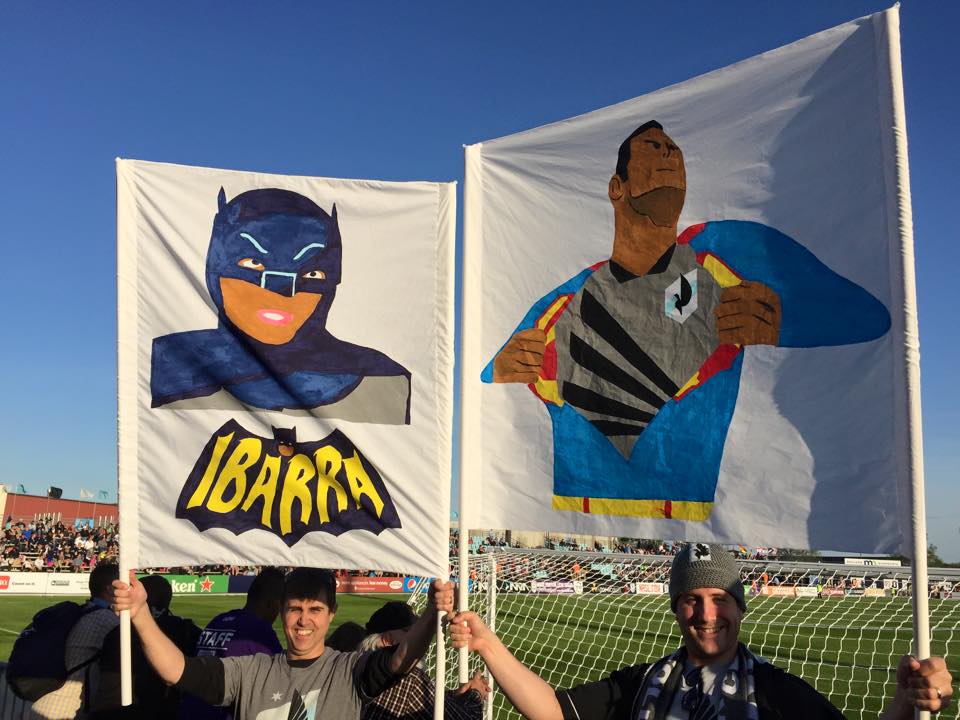
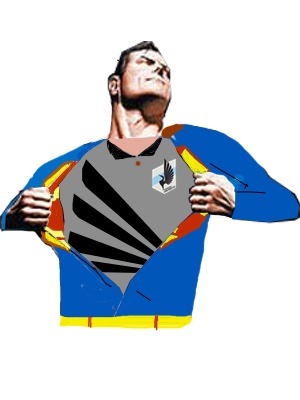
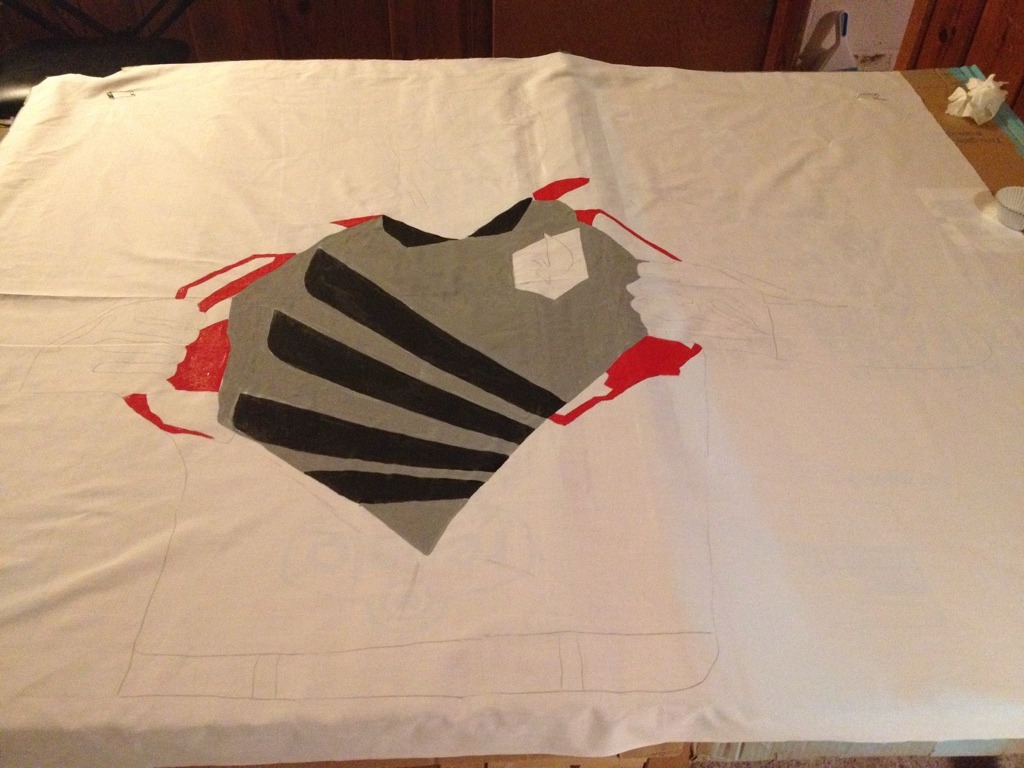
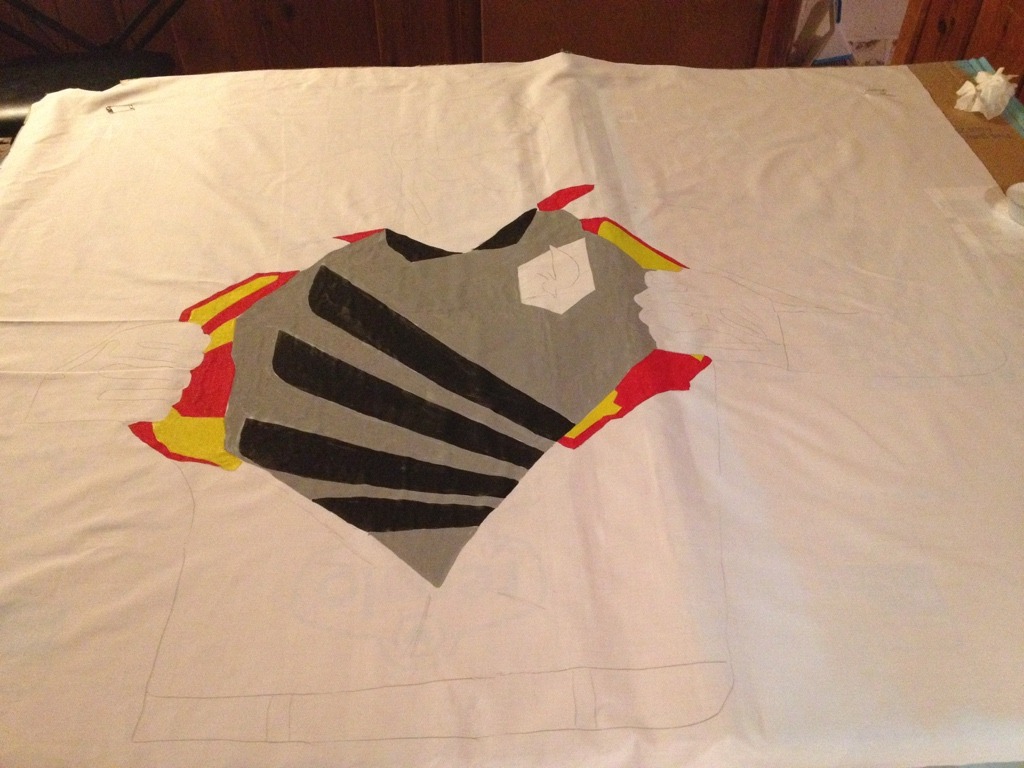
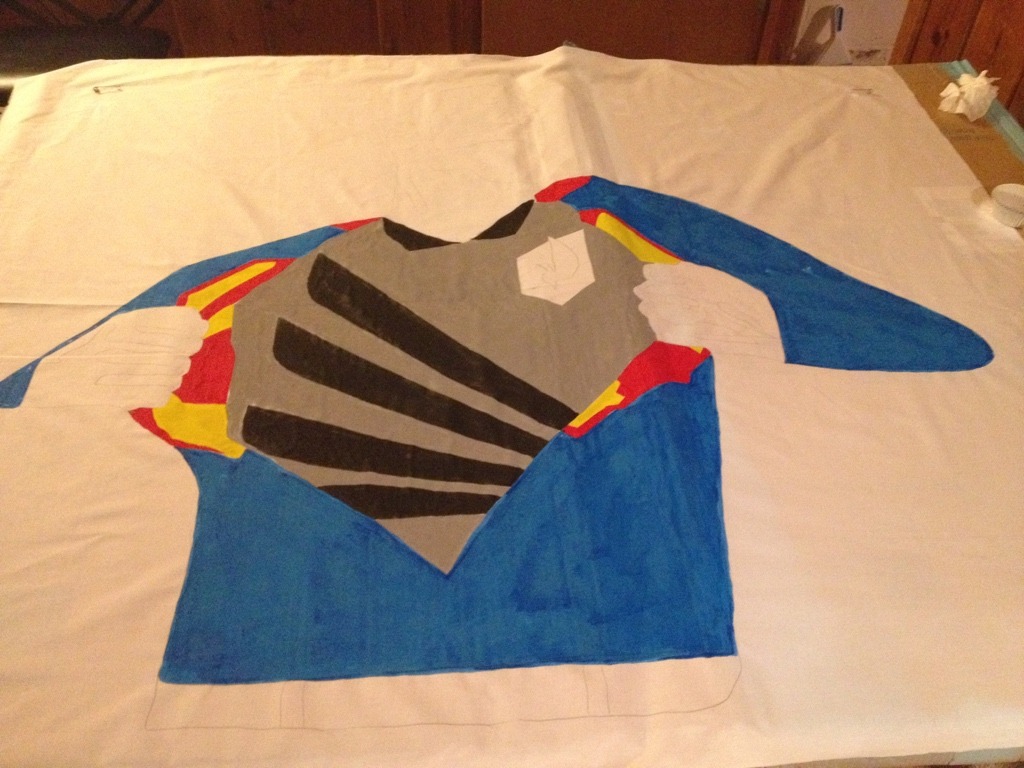
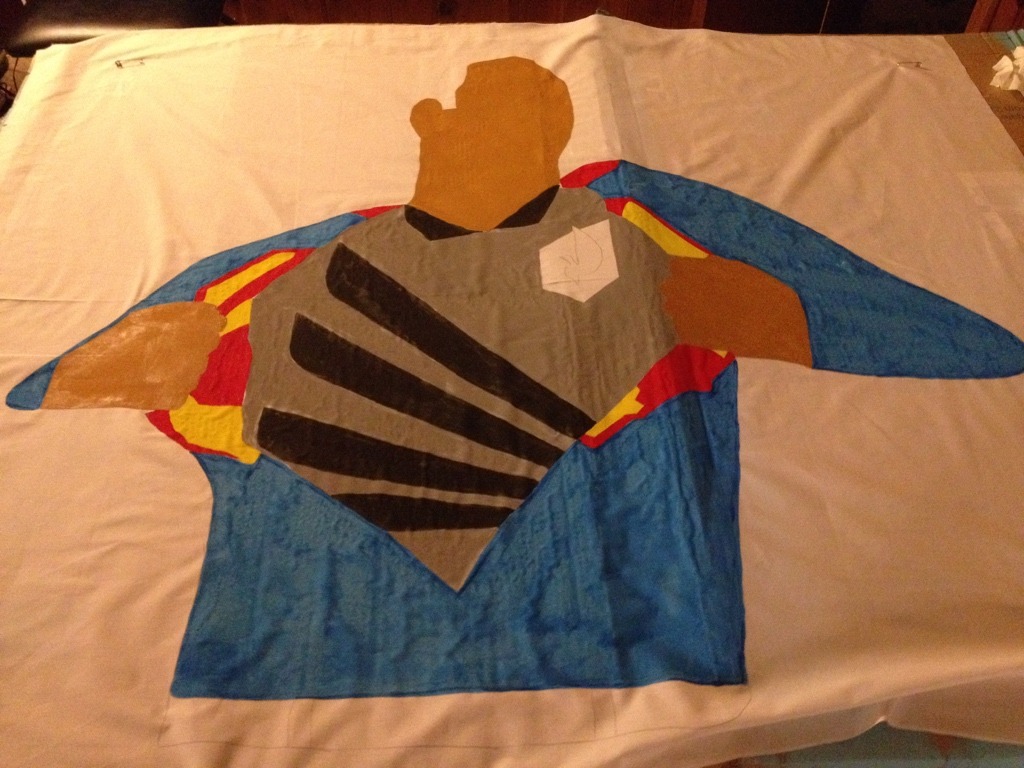
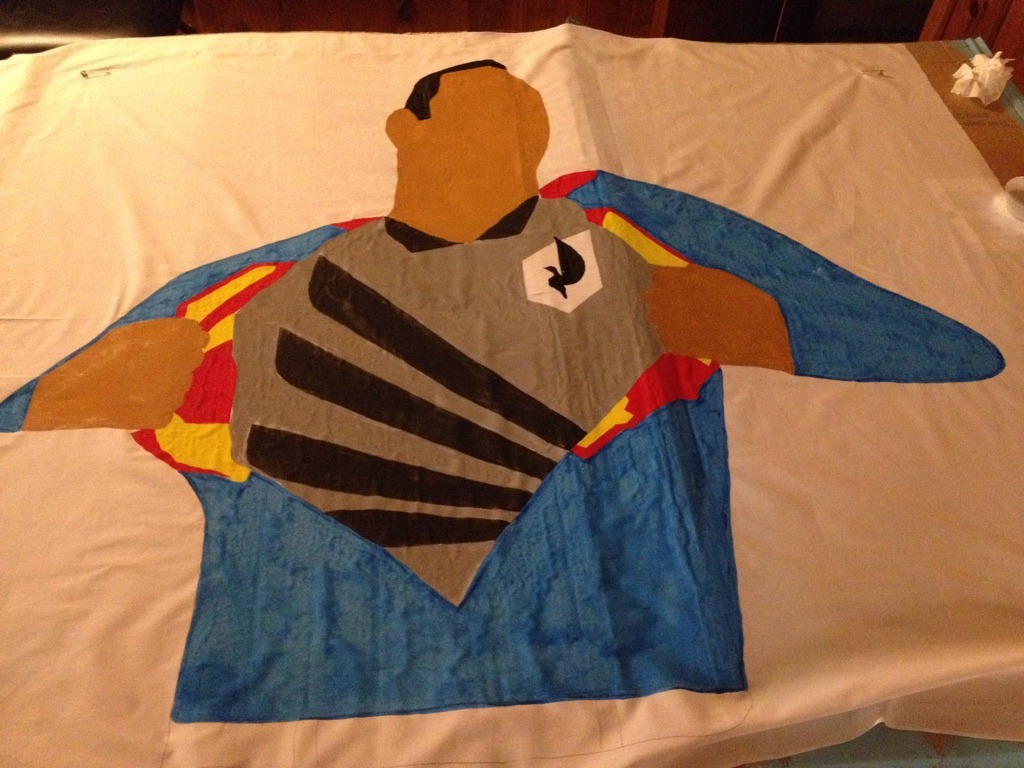
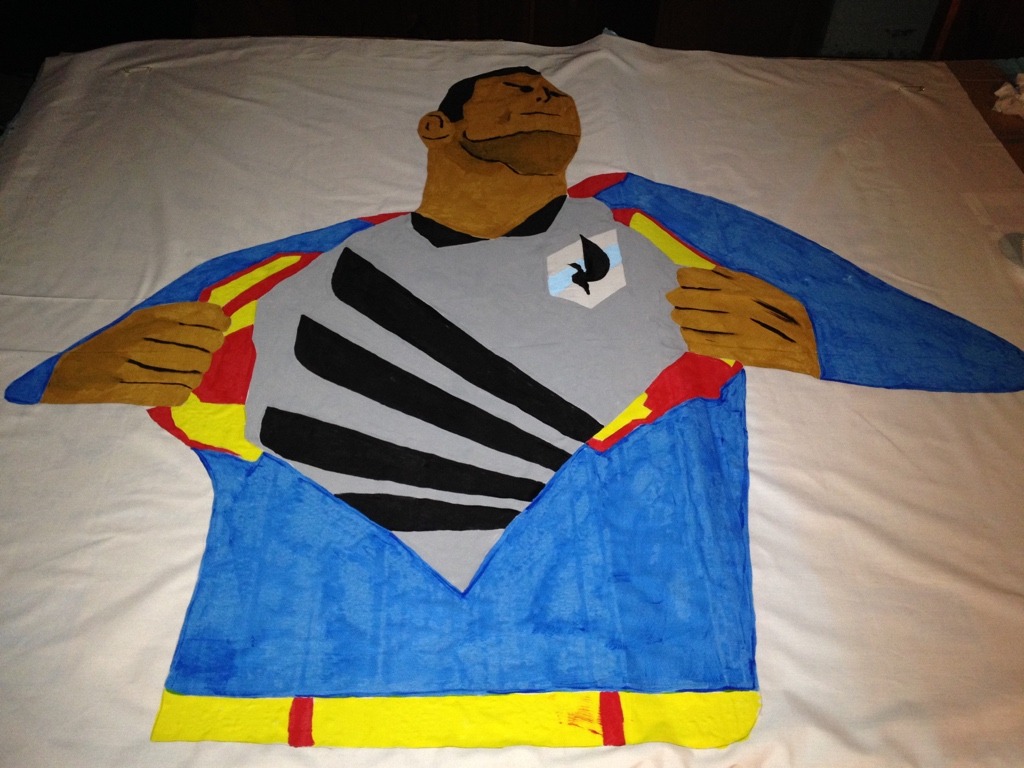
The first image below was my basis for the Ramirez Superman banner. In the second image, I’ve cut out the figure and colored over the top of it what I wanted the super suit and Loons kit should look like. I also found an image of the Loons crest, shrunk it down, and pasted it in.

Think about how your design projects. Generally it will be seen from afar, so if you have a lot of small detail that’s great but most people in the stadium won’t be able to pick it out. Conversely, your detail doesn’t have to be executed to the pixel. I’ve found that faces and hands are really hard to make look good close up, but from 20 feet away it looks fine.
There’s not exactly a standard size for 2-poles, but many have a width somewhere between 3 and 4 feet wide (plus room for pockets for the poles), and 3 1/2 – 4 1/2 feet tall. If you want to make a single-poled flag, you can probably get away with a larger design. Plan your design with the rough dimensions in mind.
Gather Your Materials
You Will Need:
- fabric
- fabric paint
- brushes
- 3/4″ to 1″ PVC
Fabric:
You’ve got some options. The most straightforward to acquire is probably to just use a plain cotton bed sheet, but you’ll have to make some extra cuts yourself. I like to use 65% polyester/ 35% cotton broadcloth. It’s fairly cheap, holds paint well, and the dimensions are just right for a 2-pole. You can get this at your nearest big-box fabric store. Another option I’ve heard works well is ripstop nylon, which is more durable but is harder to paint. Broadcloth works well because the width is 44″, just right for the width of your finished banner after accounting for handle pockets. This is sold by the yard. A single 2-pole will probably require slightly more than one yard.
ProTip: If you go the broadcloth option, do not pay full price. Jo-Ann and Hancock ALWAYS have coupons on the internet to get one item 50% off. For fabric, this means one cut. If you’re a regular, or look like you might be a regular, the clerk might just automatically give you 50% off, but if you’re a 30-something dude like me, you’re going to have to ask about it yourself, and they’re going to hassle you for the coupon, so print one out just in case.
http://www.joann.com/coupon/
https://hancockfabrics.com/coupons/coupons.html
Fabric Paint:
While you’re at the fabric store, you might check out what they have for fabric paint, but I’ve found they don’t really have a great selection. I’ve had really good luck with “Jacquard Textile Colors” which you can order online from www.dickblick.com . This stuff covers really well, so the small 2.25 oz bottles should be plenty for even several banners unless you have a huge area you need to cover. It’s kind of expensive though – $3 a bottle adds up quick, so keep that in mind when you’re coming up with your design – you don’t want to have to buy too many colors.
http://www.dickblick.com/products/jacquard-textile-colors
You could just use regular old house paint too, but the advantage of fabric paint is that it’s flexible, unlike house paint which will get hard and crack and crumble, and it’s colorfast so you can wash it. If you want to use your banner over the course of a season, fabric paint will hold up a lot better.
Brushes:
The small foam brushes you get at a hardware store work really well. They’re cheap, versatile, and reusable. Get a handful. You may also want a cheap brush or two like the kind kids use for watercolors if you have some tight detail or for lettering.
PVC:
You won’t need this until the banner is finished, but you want a 10′ length of 3/4″ or 1″ PVC, cut in half. They will cut it at the store for you.
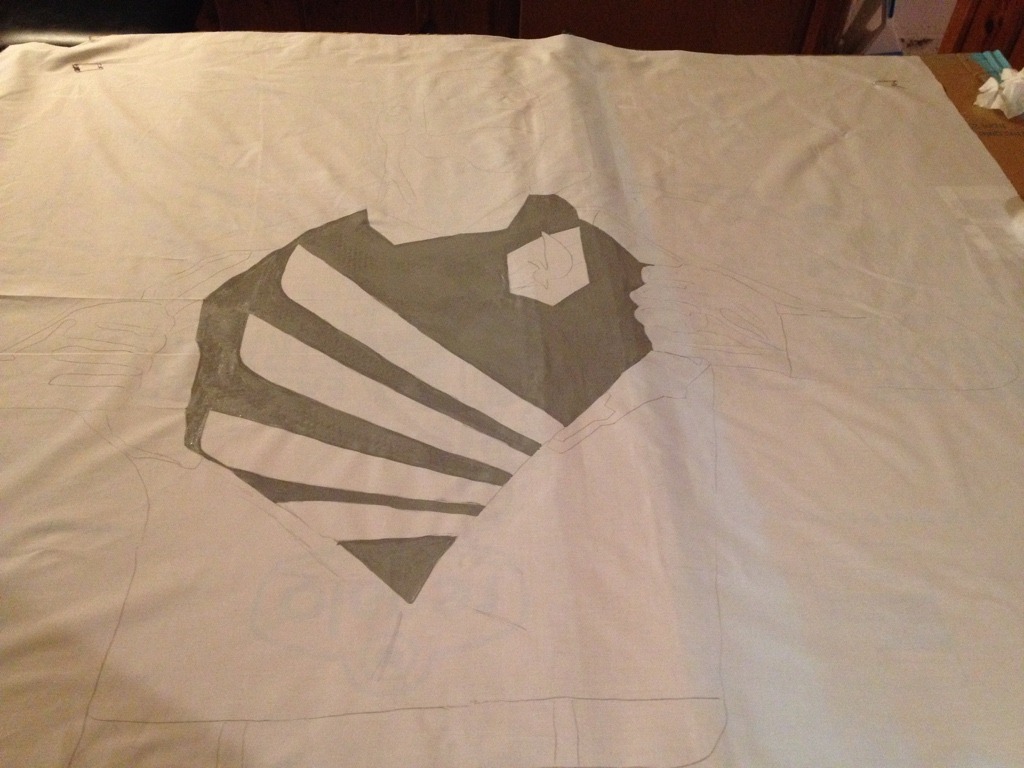
Trace Your Design
This is the one step where you need special equipment – a projector. I got a low-quality one for about $50 on Amazon, but if your workplace will let you commandeer one of theirs that’s a good option too. Cut your fabric to the desired size for your banner – again, be sure to leave about 4-5″ extra on each side to make the pockets for the handles. Tape your fabric securely and tautly to the wall and project the image onto it. With a pencil, you are going to trace a huge paint-by-numbers onto the fabric. Depending on the quality of your projector, you might need to eyeball it a bit/a lot. When you’re done, take a second look and make any edits before you start painting. ProTip: Don’t move the projector once you start tracing because you’ll never get it lined up just right again with what you’ve already traced.
Paint!
Secure your fabric on a flat surface so that it’s taut and mostly wrinkle free before painting. You may want to iron it. Make sure you have something underneath like plastic sheeting or cardboard to catch any paint that bleeds through. If you use cardboard, some of it may peel off and stick to the back of your banner when you’re done.
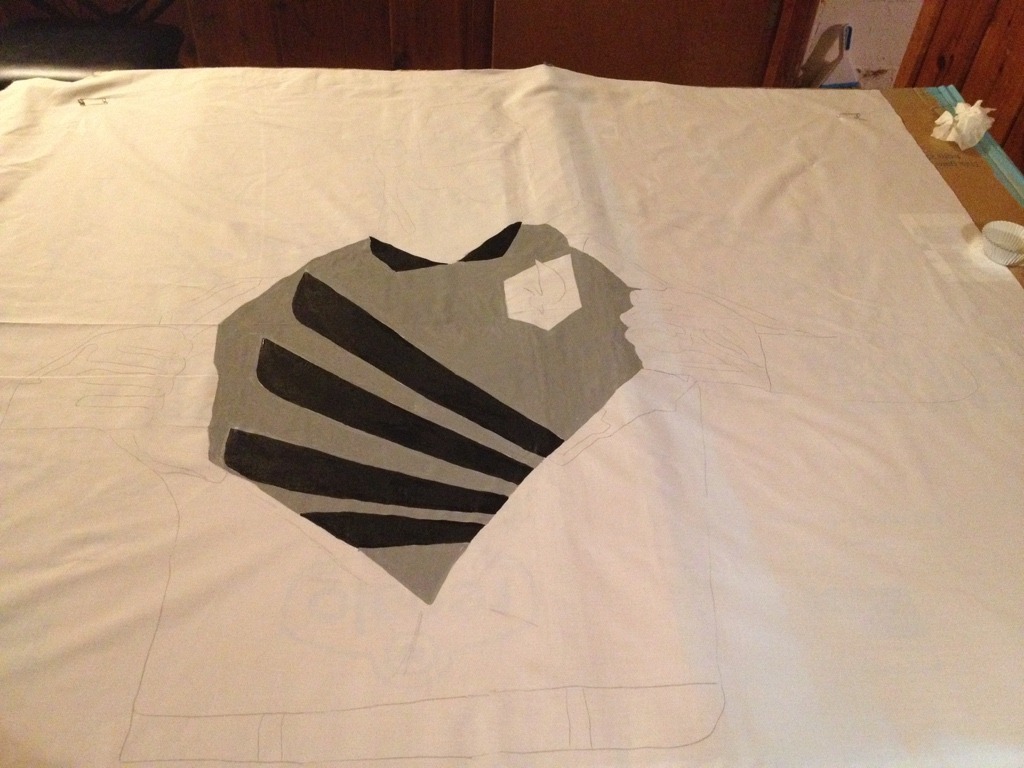
Now you’re ready to do your paint-by-numbers. Here’s some tips:
- Work from the middle out if possible so you’re not leaning over wet paint
- Start with lighter colors if possible because they won’t cover darker colors very well (especially yellow)
- Do one color at a time. You don’t need to let it dry before moving on to the next color.
- It’s harder to cover up mistakes at the edges of your design, so take your time with the edges.
Handle pockets
With the banner face down, take the extra fabric you left on each side and fold it over to leave enough room to slide the PVC handle in, and fasten it. If you’re making a flag, and not a 2-pole, then you just need to do one side.
If you have a sewing machine, sew up the pockets. If not you can always glue it with fabric glue, or even just staple it, although this may not hold up as well over the course of a season. Be sure to close up the tops of the pockets as well. If your sewing machine is extra fancy, you can surge the top and bottom of the banner which will give it some extra durability.
And that’s it. Congratulations! You’re done and you just made an awesome tifo. Now, rock it at the game and COYL!